If you’re looking to take differentiation to the next level, cubing is a strategy that is worthy of researching and implementing. Cubing is an instructional strategy that asks students to consider a concept from a variety of different perspectives. The cubes are six-sided figures that have a different activity (or a number that corresponds to a question) on each side of the cube. A student rolls the cube and completes the activity that comes up. Cubes are extremely versatile, so they can be utilized in pairs, for group tasks, or as independent work. If students are working with others, they take turns rolling the cube and completing activities. You can decide if you want them to always complete whatever they roll or whether you will allow them one additional roll. If they are working with partners or groups, you can also assign roles like scribe, and discussion directions/roller. They can switch after so many rolls to share responsibility.
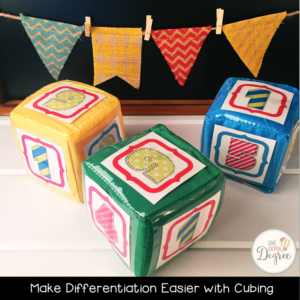

The beauty of cubing is how easy it is to differentiate for ALL learners. You can group by student readiness, interest, or by their learning preferences. Additionally, by design, cubing allows teachers to differentiate in a very discrete and non-obvious way. Since all students are working with cubes, they are often unaware of the fact that other groups may be doing something a little different. Another big perk is that cubing gives students who like more tactile approaches to learning a chance to use their hands, move around, and feel like they’re “playing” as they learn. It’s so flexible, and it’s a great way to incorporate more depth and complexity in a fun, non-threatening way. If done right, it can also provide students with a chance to look at a concept from a series of different perspectives. When done incorrectly, it can end up being just a glorified worksheet. How can you avoid falling into that category? Aim for the higher levels of Bloom’s Taxonomy or Webb’s Depth of Knowledge. You don’t want to focus merely on basic fact recall… it would be a missed opportunity.

So how can you get started? Begin by deciding which part of your unit lends itself to optional activities and student choice. Decide which concepts are ripe for this kind of an activity. Is it possible to create multiple cubes for different levels, interests, learning preferences, or topics? The answer is almost always an emphatic YES. You can, and once it’s done, it’s always going to be in your teacher’s bag of tricks to adapt or pull from in the future.

Write 6 questions that ask for information on the selected unit of study. You can pull questions from old quizzes, worksheets, or textbook study questions as a starting point, but as aforementioned, use Bloom’s, teacher observations, learning inventories and other resources to consider the needs of all students, and aim high! Really try to provide adequately challenging questions that require your students to truly THINK about what is being asked. You can do this by asking probing questions that ask students to analyze, evaluate, or create, for example. You may want to have one opinion-based question for each cube to really facilitate discussion or debate within each group.

Use the first cube as your “average” or grade-level cube, then adjust up. This Standards Slider is an amazing resource for adjusting your lessons up or down to meet your students’ needs. Create two more using one as a lower level and one as a higher level resource. Remember though, all cubes need to cover the same type of questions, just geared to the level. Try not to water the content down or make it too busy. Label your cubes or color-code them so you know which level you are addressing. I like to use color-coded baskets numbered 1-3. When I print particular resources, I can place them in the appropriate basket and/or color-code them by printing them on green, pink, or blue paper. The cubes would easily fit into that same structure. (If you’re feeling unsure of yourself, ask a colleague or friend to take a peek at the cubes to see if they can determine the levels.)
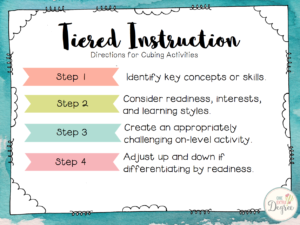

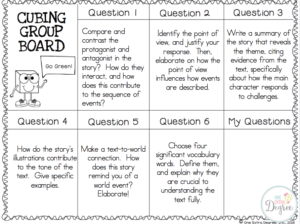
Always remember to have an easy problem on each cube and a hard one, relative to the levels. Decide on the rules: Will the students be asked to complete all 6 sides? Will they roll and do only 4 sides? How will this look? Will they use a choice menu like the tiered examples below? Make sure that you clearly communicate your expectations to your students.
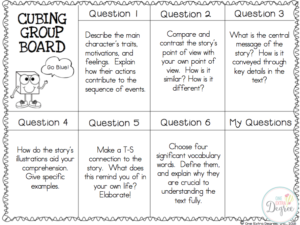
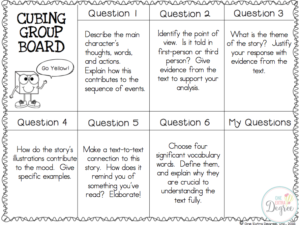

Students can describe, compare, associate, analyze, apply, argue for or against something, rearrange, illustrate, question, satirize, evaluate, connect, cartoon, change, solve, synthesize, etc. There’s so many directions you can go, but as you can see, we are aiming for something that really requires reflection and deep thinking– questions that don’t have an immediate yes or no answer– that aren’t based solely on the memorization of facts. You might have students arrange something into a 3D collage, make a body sculpture to show a concept, create a dance, present a monologue, build or construct a representation of something they’re learning about, make a living mobile, create sound effects, etc.
- Describe It: Look closely at the subject. Explain it with sensory details.
- Compare It: What is it similar to? What is it different from?
- Associate It: What does it make you think of? What comes to your mind when you think of it?
- Analyze It: How is it made? What are its attributes or traits?
- Apply It: How can it be used?
- Argue For or Against It: Take a stand. Support your opinion with evidence.
I LOVE to keep things simple, so I use the Differentiated Instruction Cubes by Carson Dellosa, and then I number each side. This allows me to distribute the cubes without worrying about switching everything out of the sides. I can simply create three choice boards to correspond to each number. Then I can print them out on paper that corresponds to each cube, file them away in a binder, and have them ready to go the following year. In my opinion, it really simplifies the process rather than worrying about cutting and creating a cube, but many people enjoy creating tangible paper cubes with questions as well. It really depends on your preference. If you are interested, I have included number templates, a cube template, and a choice board template on TpT for free. Click on the image below to check out my Differentiation with Cubing file!

Think of your students needs, and then tailor your questions to suit their needs. Be creative, and have fun with it! Chances are, your students will too!

Leave a Reply